
Stampers by the Dozen - 01/19

My best friend moved house this week after waiting over a year for her house to be built/finished - I wanted to give her a little something so I decided that a gift voucher would be a good idea.
Take one gift voucher - it looks nice enough but obviously I could not give it to my friend like this could I?

As the voucher sat on my desk, I realised that the colours and the flowers reminded me of something I had been using all week for Coffee & Cards sessions - the Needlepoint Nook Designer Series Paper.
So my fancy fold project is a gift voucher holder - I've not made one of these for several years as I am not generally a fan of giving gift vouchers. This is what I came up with - sort of a gate fold card with a surprise!

I used thick Whisper White (WW) card for my project.
Measurements for the base
4 1/4" x 11" - score at 2" on one side and 3 1/2" on the other
Measurements for the inside mechanism
7" x 3 1/2" - score at 2" on one side and 1/1" on the other
You will also need a piece of WW to cut a Rectangle Stitched shape from.
Measurements for the DSP
4" X 3 1/4"
4" X 1 3/4"
Crease all the score lines and adhere the DSP to two front panels. Using fine Red Line Tape adhere the two short sides of the right hand panel to the base.
For the inside mechanism, I used 1 1/2" Circle Punch on the 2" flap. I used fine Red Line Tape to adhere both sides to create a pocket for the voucher. I then placed double sided tape on the 1/2" flap.
Top Tip
Before adhering the mechanism, place the punched end into the pocket on the card base - much easier this way!
This was then adhered to the inside of the card.

You can see here how the card looks when it is flat ... the voucher mechanism is adhered in line with the spine on the left hand side - this creates the sliding mechanism when you open the card that reveals the voucher.

I knew I would need something to close the card so at this point I wrapped the card with some Old Olive Sheer Ribbon and adhered it with tape on the front and the back - don't worry this will be hidden from sight soon.
Decorative Panel for the front
I started with a Stitched Rectangle and some die cut bits and pieces cut from Garden Green and Old Olive.
As I said, I have been using items from the Needlepoint Nook Suite all week. At some point I realised that it was possible to mirror the stitched pattern one of the framelits produce.

I added corresponding die cuts - adhered with just a tiny spot of Tombow at the base to allow the pieces to be raised and shaped slightly to add dimension.
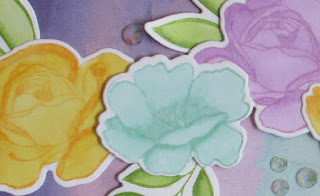
I then stamped and die cut an assortment of flowers and leaves and arranged them to the pane; adhering them with Tombow and Dimensionals.

I then realised I had a pot of these gorgeous mini buttons with a lovely pearlescent finish on them that I hadn't used yet. - They provided the perfect finishing touch and were adhered with Mini Glue Dots. The panel was adhered with Dimensionals taking care not to put them on the right hand edge for obvious reasons!
I covered the reverse of the card with a panel of Blushing Bride card and added a WW layer on top (1/8" smaller) to hide the ribbon. I stamped this lovely sentiment and added some butterflies as an accent leaving myself plenty of space to write a message.


Here is the completed project with the envelope. (I could not resist stamping some more butterflies in the corner).

I can't wait to visit my friend and to see her new house; unfortunately she has now moved a bit further away; around 175 miles, so I will have to plan a long weekend very soon.
I have no idea what this fancy fold is called - a gate fold slide out pocket card perhaps? If you know, I would love you to tell me! I hope my instructions make sense - one day I will do a video tutorial and it will be much easier! If not, let me know and I will try to explain again.
Thanks for hopping along with us - Stampers by the Dozen will be back again in February with more inspirational projects for you.
Next up is Tricia - I can't wait to see what she has created this month!

Happy hopping!
Susan xx
Thank you so much for looking at my Blog today, if you don't have a Stampin' Up! Demonstrator and you live in the UK, I would love to be yours!
If you need to order any supplies, simply use my “shop with me” button or click on the catalogue links on the right. Alternatively, contact me and I would be happy to place an order for you.
The Spring / Summer and Sale-A-Bration catalogues launched on the 3rd January. If you would like copies let me know and I will pop them in the post for you.

Would you like to receive a FREE gift from me?

Would you like to receive a FREE gift from me?
All orders placed directly with me or online receive a handmade card from me as a thank you but did you know that all orders over £20 (excluding postage) will receive a gift from me too? If you use the current Hostess Code I will pop something in with your order or post directly to you. (Please remember to allow me to access your contact details otherwise I won't be able to contact you).

If your order is over £150 please don't use the code as you will receive your own Stampin' Rewards. You will still receive a card and a gift from me.
Here are the products I used today. All products are from Stampin’ Up! and can be purchased directly from my online shop by clicking the images below.
If you are local to me and can collect, I’m happy for you to piggyback one of my orders to save on postage.
If you have any questions, I’m happy to help. You can email me susan_merrey@yahoo.co.uk or telephone 07905 403 823.
Thank you for shopping with me and supporting my business!


WOW, WOW, WOW :-) I love, love, love this :-) What a lovely card/gift card holder. STUNNING!
ReplyDeleteThank you Sharleen - once I figured out the measurements it was really quick to put together.
DeleteWhat a wonderful card, such a challenge
ReplyDeleteThanks Carly.
DeleteThanks Deb - it was fun to make.
ReplyDeleteI love this fold and how you coordinated the card to the gift card envelope.
ReplyDeleteThanks Judi - it was the gift card that provided the inspisration!
DeleteLove your pretty gift card holder. The designer series paper works beautifully with the gift card. :)
ReplyDeleteThank you Tricia - I love the colours in this DSP (and the images)!
Delete