
Art Gallery - Stampin INKspirations Blog Hop


If you are starting here with me or hopping over from Rebecca-Jo welcome, the theme for our hop is 'something new' - this could be a new job, new regime or new crafty goodies. There are 35 of us from all around the world for this first hop so, you might want to grab a cuppa before you start to hop around!
With the launch of the brand new January - June mini catalogue and all the gorgeous new products in there of course I was going to play with new goodies wasn't I? I had to make a tough decision as to which new items to use.
I eventually decided to play with some of the items that can be found in the Fine Art Floral Suite (page 32).
The lovely flowers and textures in this suite are a modern take on classic impasto paintings. Rich textures, lovely florals, gold leafing and more all work together to create a fine art look that is sure to yield beautiful results.

Did you spot the Gilded Leafing embellishment that is part of this suite? I have long been a fan of these wonderous gilding flakes so I could not wait to get my hands on this new offering from Stampin' Up!
So, here is my project:

The colours I used:
You will need:
21 cm x 14.5 cm Granny Apple Green - scored at 10.5 cm
10 cm x 14 cm Granny Apple Green
6 cm x 10.5 cm Basic White Thick (BWT)
Basic White Thick (BWT) for stamping and die cutting
10 cm x 14.5 cm Basic White (BW) for the insert
The background:
I used the leaf image and Granny Apple Green ink to stamp a border of leaves around the Granny Apple Green panel - I do love a spot of tone on tone stamping don't you? No need to waste time or indeed ink stamping in the middle of the panel as it will be covered up!

The embossing:
I used a fabulous new 3D embossing folder called Painted Texture with the small BWT panel. And guess what? It does look exactly like painted texture - so much dimension and texture that looks just like an impasto inspired palette knife texture. I know I will be using this folder a lot!

The stamping and gilding:
- Stamp the flower onto the piece BWT firstly with So Saffron ink.
- Stamp the additional detail with Bumblebee ink.
- Rub over the stamped image with the Embossing Buddy. Stamp the detail image again this time using Versamark ink and sprinkle Heat & Stick Powder on top. At this point you can use a fine paint brush to remove some of the powder if you like.

- Using a heat tool, gently heat the powder until it turns shiny. I used my heat tool on the lowest setting.
- Gently pick up the gilding flakes and lay on top of the image, pressing down gently with a soft brush. I used a small sponge to gently swirl over the image to remove excess gilding.

Top Tip #3
To assemble:
Adhere the stamped Granny Apple Green panel to the card base with dimensionals. Wrap some of the sparkly Fine Art ribbon around the bottom of the embossed panel adhering with double sided tape. Attach the panel to the card front with dimensionals.

The finishing touch:
Take a small piece of ribbon and pass underneath the adhered ribbon, tie in a single knot and trim the ends. I quite like the frayed ends but you can always neaten if you prefer.

The details:
The gilding on this flower is so pretty - I will be having lots of fun with these gilding flakes - so many techniques to try with them but, so little time!

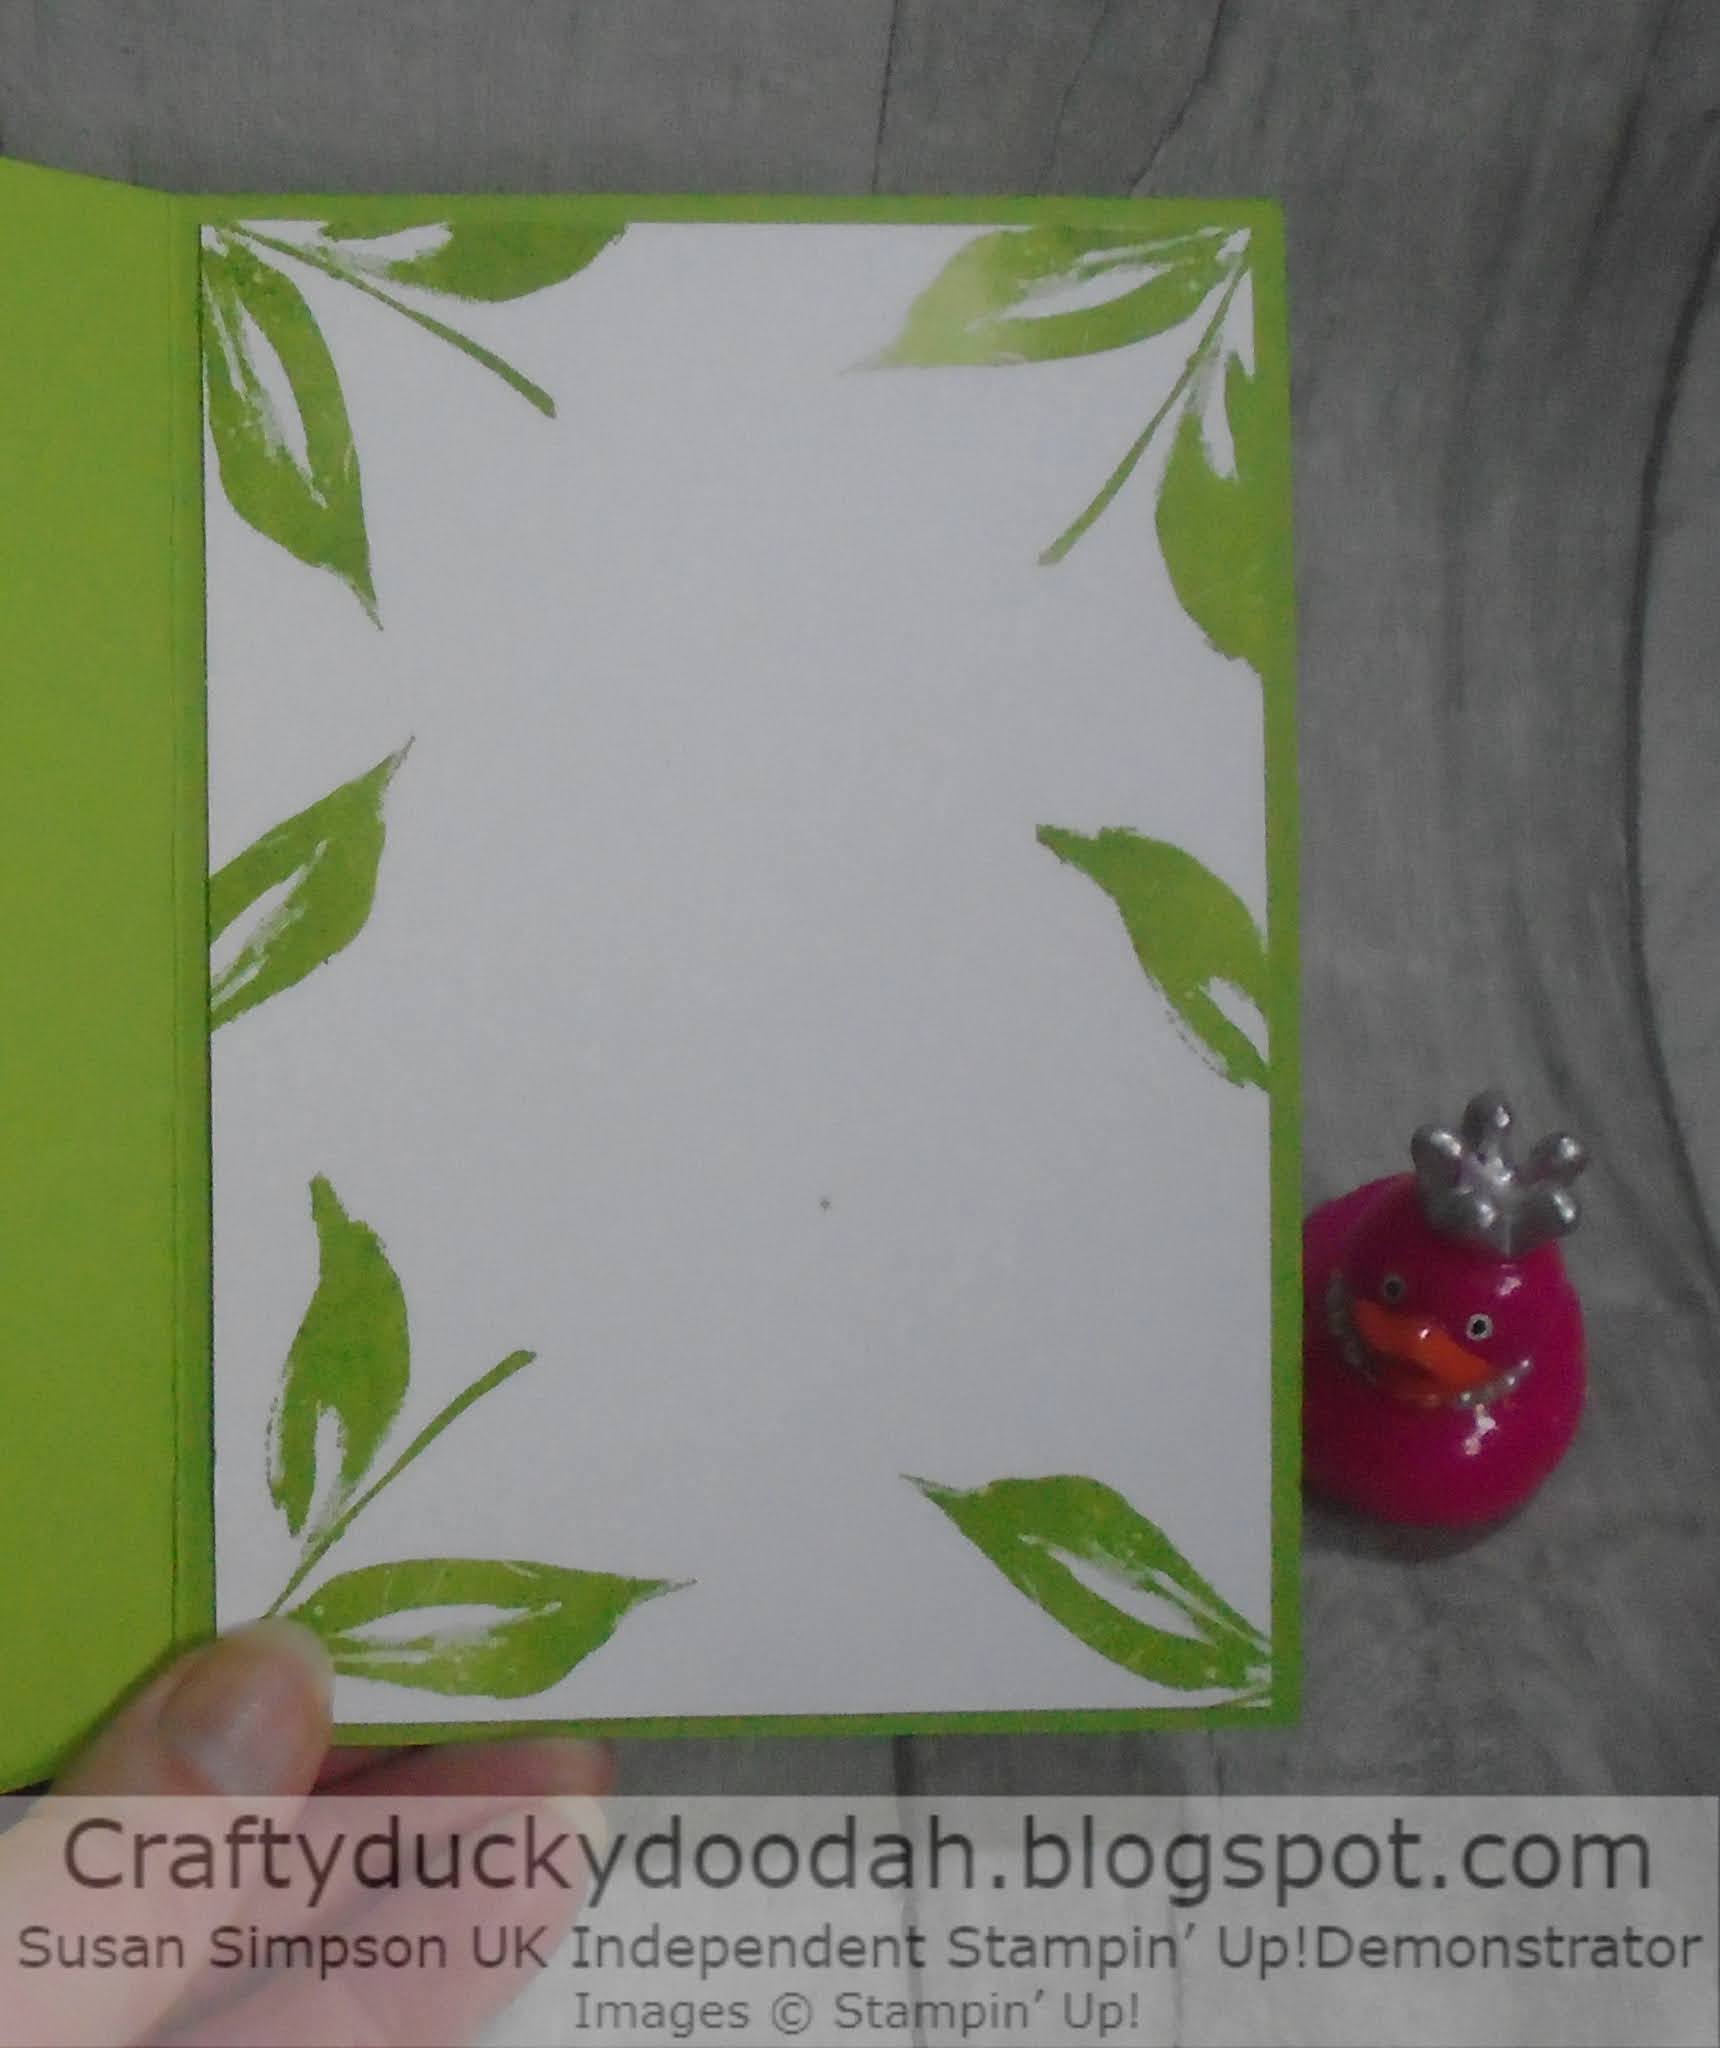
The inside/envelope:
Stamp a border around the edge of the BW panel with Granny Apple Green ink.

Adhere to the inside of the card with double sided tape. I also stamped a leafy border along one edge of the envelope.
The completed project:

Next up is Danielle Kassing who has a lovley project to share with us using more new goodies.

Thanks to the lovely Angie McKenzie for organising this new hop and keeping us all in order! If you get lost along the way, a list of participant s can be found below.
Details of the products I used for this project can be found at the end of this post.
Happy hopping, don't forget to leave comments as you hope around to let us know what you think of our projects - we like that!
Susan xx
January 20201
Angie McKenzie ● Jo Blackman ● Jan Musselman
Tricia Butts ● Shel Anderson ● Libby Fens
Gez Carpenter ● Sue Allen ● Karen Henderson
Elaine de Montmorency ● Leonie Stuart ● Mo Rootes
Linda Moore ● Annette Ball ● Jill Chapman
Ann Krucek ● Susan Webster ● JoAnn Pollock
Narelle Fasulo ● Terry Hamilton ● Rebecca-Jo Unwin
Susan Simpson ● Danielle Kassing ● Sharon Hashimoto Burkert
Ilse van Vliet ● Cheryll Miller ● Rochelle Laird-Smith
Mikaela Titheridge ● Alejandra Gomez
If you need to order any supplies, simply use my “shop with me” button or click on the catalogue links on the right. Alternatively, contact me and I would be happy to place an order for you.
If you would like a copy of either of the current Annual Catalogue or the current Mini Catalogue let me know and I will pop one in the post for you. If you prefer, you can view an online version by clicking the link to the right of this post. Also, the January - June Mini Catalogue and the Sale-A-Bration Brochure are available now - if you would like a copies, let me know!


Thank you for shopping with me and supporting my business.


Pretty card Susan, loving your fresh colour combo x
ReplyDeleteThanks Mo xx
DeleteBeautiful cards. Thank you for the tips about the Gilding Leaf.
ReplyDeleteThank you Linda.
DeleteGreat card, thanks for sharing the tips about the gold embellishments.
ReplyDeleteOk, this is my favorite suite, so far! I love your card, Susan. Thanks for the gold leafing tips. I haven't used the gold leafing yet.Thanks for sharing!
ReplyDeleteThank you Jan - you will love the gold leaf. The contents of the pot will go a long way!
DeleteI love your yellow flower with the gold flakes on it. I'm going to have to try it out now. I haven't used them yet, a friend shared some of hers as I didn't get them. Love the colors!
ReplyDeleteThanks - you have a good friend there!
DeleteThe gilding looks like so much fun. Nice card.
ReplyDeleteThanks Jo - yes great fun; you should try it!
DeleteThat gold is amazing. Just gives your card that extra's. Love it
ReplyDeleteThank you Danielle.
DeleteLove your colours and your beautiful card!
ReplyDeleteThank you Leonie.
DeleteLove that background!!
ReplyDeleteThanks, creating backgrounds is so much fun to do.
DeleteVery fresh and ohhh those gold guilding flakes.... I am in love with them! Great card!
ReplyDeleteThank you - yes they are amazing and lots of fun too.
DeleteLove your colour combo - and the gold elements really add something special.
ReplyDeleteThank you Melissa.
DeleteAbsolutely gorgeous, Susan! Love how you added the gilding to the center of that amazing flower. And the touch of glitter in your gilding storage box is ingenious! Love it!!! Thanks for the inspiration as always and for hopping along with us. x
ReplyDeleteThanks Angie, I just knew that I would find something suitable for the storage box! Thanks also for organising the hop.xx
DeleteBeautiful! Love the colors you used and the addition of the gold foil is perfect. Thank you for the storage idea for the gold foil
ReplyDeleteFabulous fresh colours and I love the little embossed canvas behind the flower!
ReplyDeleteLovely card Susan, thanks for sharing.
ReplyDeleteBeautiful card and the addition of the gilding flakes is gorgeous x
ReplyDeleteI love your bright colors; a beautiful card!
ReplyDelete