Stamp 'N Hop - Sale-A-Bration 2019
Hello and welcome to the first Stamp 'N Hop of 2019! We are a group of Demonstrators from around the World who love to share our love of paper crafting. If you are joining me from Mo at Crafty Rootes (Mo is a fellow team member and her projects are always so pretty), or are starting here with me - welcome, I hope you will find lots of inspiration as you hop around with us.
This month we are focusing on all things Sale-A-Bration (or SAB for short), using anything from the SAB brochure.
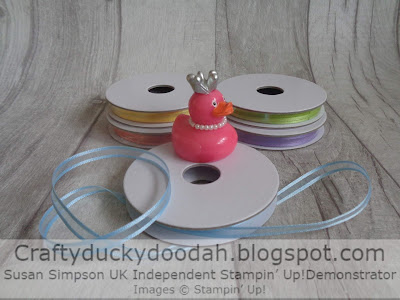
There are so many lovely new products in the SAB brochure that it was a very difficult decision as to which item I would use for my project. However, after a lot of thought I decided I would use the Organdy Ribbon Combo Pack.
Perhaps not the most exciting item available during SAB but I do love ribbon! This delicate ribbon, in 5 great colours is a dream to work with.
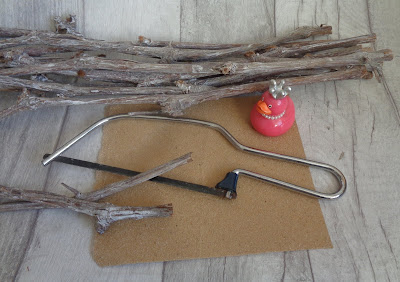
I've had an idea floating around in my head for a special project for a while now - all I needed were some twigs.
After waiting ages, the ones I ordered finally arrived this week. Que a busy morning at Craftyducky HQ with a hack saw and some sand paper as the twigs I sourced were too long!
I used the Butterfly Gala stamp set and the Butterfly Duet Punch to create lots of pretty butterflies - stamped in Balmy Blue ink to coordinate with my choice of ribbon. (The stamp and the punch are currently available as a bundle = a 10% discount). I also punched out corresponding butterflies from Balmy Blue card stock.
I used my Stampin' Pierce Mat and Piercing Tool to carefully poke two holes in the top and bottom of each butterfly body.
Then I did something that I don't do very often - I got a needle out as I had the mad idea to sew the butterflies together. I'm still not sure what came over me but it definitely won't happen again for a while I can tell you as I hate sewing!
I stitched the stamped and card stock butterflies together with some Silver Metallic Thread and then repeated again as I thought the thread would look pretty doubled up.
I then left a gap and added a further two sets of butterflies to each piece of thread before attaching to the twig with a double knot. I also added a jewel to the head on the larger butterflies.
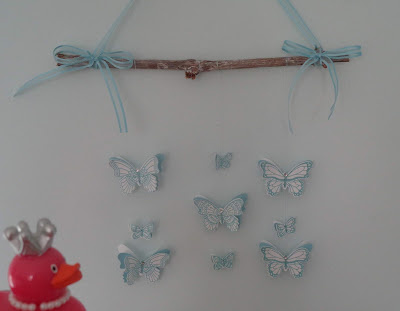
Once I had three threads attached to my twig I made a hanger with some of the Balmy Blue ribbon and tied two bows - one for each end. I used red line tape to attached the ribbon to the twig and glue dots to attach the bows. (This lovely ribbons makes it easy to tie beautiful bows).
At this point I thought I was finished - how wrong could I be? When I hung the mobile the butterflies would not hang straight, no matter what I tried.
I was so disappointed but, after sleeping on the problem I came up with what I hoped would resolve this. Only problem is that I work on Friday mornings so I had to wait until I got home mid afternoon today before I knew whether my idea would work or not.
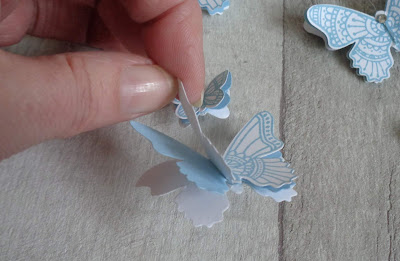
I stamped and punched out more butterflies and attached one to the back of each butterfly pair. I used Tombow this time, taking great care to ensure that the thread hung vertically at the top of each head. If I had known the butterflies would be unbalanced I would have stitched three of them together in the first place saving myself all this angst - hey ho!
TA DA - it worked - I was so pleased and very relieved as I had no time to come up with another project!!
Here is the completed mobile floating in the breeze from the hot radiator below.
It would also look lovely hanging on the edge of a shelf too as the butterflies would be able to move more freely or, perhaps haning in a window ...
Next month I am definitely not going to leave my project till the last minute (again).
The Organdy Ribbon is so pretty; I can hardly believe that you get 5 spools in these gorgeous colours (4.6m each) for free with just a £45 order. I love it so much that I've already ordered another set in case I start to run out!
I hope you enjoyed my project; I would love you to leave a comment to let me know what you think below.
Next up is Sandra - I can't wait to see which product she has chosen to use and her project. Click the 'next' sign below to continue on the hop.
Thanks for hopping with us, hope you have a crafty weekend.
Susan xx
If you get lost along the way here is a list of hop participants this month.
Thank you so much for looking at my Blog today, if you don't have a Stampin' Up! Demonstrator and you live in the UK, I would love to be yours!
Susan Simpson - Craftyduckydoodah! (UK) – you are here!
Jenn Charles - USThank you so much for looking at my Blog today, if you don't have a Stampin' Up! Demonstrator and you live in the UK, I would love to be yours!
If you need to order any supplies, simply use my “shop with me” button or click on the catalogue links on the right. Alternatively, contact me and I would be happy to place an order for you.
The Spring / Summer and Sale-A-Bration catalogues launched on the 3rd January. If you would like copies let me know and I will pop them in the post for you.
Would you like to receive a FREE gift from me?
Would you like to receive a FREE gift from me?
All orders placed directly with me or online receive a handmade card from me as a thank you but did you know that all orders over £20 (excluding postage) will receive a gift from me too? If you use the current Hostess Code I will pop something in with your order or post directly to you. (Please remember to allow me to access your contact details otherwise I won't be able to contact you).
If your order is over £150 please don't use the code as you will receive your own Stampin' Rewards. You will still receive a card and a gift from me.
Here are the products I used today. All products are from Stampin’ Up! and can be purchased directly from my online shop by clicking the images below.
If you are local to me and can collect, I’m happy for you to piggyback one of my orders to save on postage.
If you have any questions, I’m happy to help. You can email me susan_merrey@yahoo.co.uk or telephone 07905 403 823.
Thank you for shopping with me and supporting my business!


Lovely and so funny as I’ve eyed these up with different decorations for themes throughout the year and looking to create something similar. Love these butterflies in anything !
ReplyDeleteThanks Sandra - butterflies always make me smile!
Deletelove this great idea
ReplyDeleteThanks you Jenna, it was fun to make once I got the balance sorted!
DeleteWOW!!!! This is such a great idea....will definitely be casing this one....Thanks for Sharing
ReplyDeleteThanks Vicki - case away and have fun!
DeleteBrilliant project Susan. k x
ReplyDeleteThank you Karen xx
DeleteThis would also make a beautiful shower arrangement for the new expectant mother in blue or pink. Great project!!!!!!!!!!!!!!!!
ReplyDeleteThanks Gloria. We're not big on Baby showers on the UK but you are right - it would be beautiful and a lovely keepsake for the mum to be.
DeleteGreat idea, makes me want to move to a larger space where I can actually hang decor like this! TFS
ReplyDeleteThanks Tracy - could you make a mini version and hang from a door knob perhaps?
ReplyDeleteBeautiful project Susan, love that we can use the products to create all sorts of things, would make a nice gift too, thank you for sharing x
ReplyDeleteThanks Jo. xx
DeleteWow - awesome! Looks really pretty.
ReplyDeleteThanks Pia - it was great fun to make.
ReplyDeleteOMG!!! I did wonder at the beginning of the post what the sticks were for... Very creative <3
ReplyDeleteCheers Shaz
Thanks Shaz - the things we do for the love of crafting eh! ;)
Delete