Arrange A Wreath - Stampers Showcase Blog Hop
Hello and welcome to another Stampers Showcase Blog Hop. Our theme this month is Winter/holidays and I will be using the Arrange A Wreath bundle for my project.
If you have hopped over from Melissa Seplowitz in the USA or you are starting here with me, why not grab a cuppa and hop along with us - we have some lovely projects to share with you this month.
I decided to use the Arrange A Wreath bundle which can be found on page 127 of the Annual Catalogue. I resisted this bundle for quite some time but I finally 'gave in' and bought it and, I am so glad I did! It will be useful all year around which makes is great value for money especially as there is a 10% bundle discount on it too.
Here is my project:
I had originally intended to use ww for the brick embossed background. However when I arranged the pieces the sentiment seemed to be lost so I went with Gray Granite instead.
The colours I used:
You will need:
29cm x 10.5 cm ww thick - scored at 14.5 cm
10 cm x 14 cm Gray Granite
10 cm x 10 cm Old Olive
10 cm x 10 cm Pear Pizzazz
10 cm x 10 cm Real Red
Small piece of Gold Foil and a ww scrap for the sentiment
The embossing:
I used the Brick & Mortar 3d embossing folder, the detail on the bricks is stunning and very dimensional. I know I will get a lot of use out of this embossing folder too.
The die cutting:
You will need to die cut the following pieces.
To assemble:
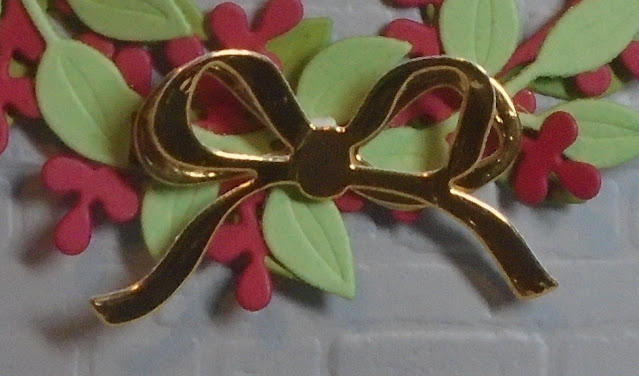
Adhere the embossed background to the card with dimensionals. I used Tombow to adhere the first layer of the wreath, diemnsionals for the Real Red layer and finally Tombow for the top layer. I used a rolled up mini glue dot to adhere the first part of the die cut ribbon and then a tiny piece of dimensional for the second layer. I also curled and shaped the bow for extra dimension.
The sentiment:
I used the smallest Stitched So Sweetly die to create a panel for the sentiment. I then stamped the sentiment using Memento ink. Adhere to the centre of the wreath with dimensionals.
Top Tip #1
I carefully positioned two of the leaves from the wreath to lay on top of the sentiment.
Top Tip #2
Whilst adhering the Real Red layer of the wreath I tried to hide the dimensionals where I knew they would be covered by the final layer. However, I did end up with a couple of partial dimensionals showing. I used the dark Real Red Stampin' Blend to disguise them. It's not perfect but if you don't know where to look, you probably won't find them! (If you look on the left of the photo above you may just be able to spot where I have coloured a white spot and left a tiny edge showing).
The detail:
Lift up some of the leaves from different layers to add more dimension.
The inside/envelope:
Unusually for me, I did not decorate the inside of the card or the envelope! Shocking I know but, I need to write a long message on the inside of the card.
The finished project:
I think this project looks quite masucline and I have just the recipient in mind! This is a really quick project to create and would look good in lots of different colours, there are so many possibilities to decorate the wreath too.
Next up is Pia Gerhardt from Germany who I am sure has a lovely project to share with us.
If you need to order any supplies, simply use my “shop with me” button or click on the catalogue links on the right. Alternatively, contact me and I would be happy to place an order for you.
If you would like a copy of either of the current Annual Catalogue or the current Mini Catalogue let me know and I will pop one in the post for you. If you prefer, you can view an online version by clicking the link to the right of this post. Also, the January - June Mini Catalogue and the Sale-A-Bration Brochure will be available very soon - if you would like a copy, let me know!
Thank you for shopping with me and supporting my business.


Perfect colorway for this pretty card!
ReplyDeleteGreat card! I love your color palette. The wreaths look great on the Gray Granite.
ReplyDeleteLovely card Susan, one of my favourite stamp sets x
ReplyDeletebeautiful
ReplyDeleteBeautiful wreath card
ReplyDeleteLovely card, this is such a wonderful bundle isn't it.xx
ReplyDeleteBeautiful card, thank you for sharing x
ReplyDelete