Poinsettia Petals - Inks Stamp Share
Hello and welcome to another Ink Stamp Share Blog Hop. This month I will be using the Poinsettia Dies for my project.
If you are starting here with me or have hopped over from Cindy Mitchel-Clark, welcome to our hop. This month our theme is Christmas tree decorations so, anything that can be hung from a tree be it a bauble or a little gift.
Here is my project:
I will add some ribbon to my project so it can be hung on a tree. I have also made some to use as gift tags for special gifts that I hope will be kept and hung on the recipients tree too!
The colours I used:
You will need:
Old Olive, Real Red and Gold Foil cardstock. How much you need depends on how many of these pretty decorations you make!
My project started with the discovery of some log slices left over from last years projects. These little slices come pre drilled with a hole and are readily available.
The die cutting:
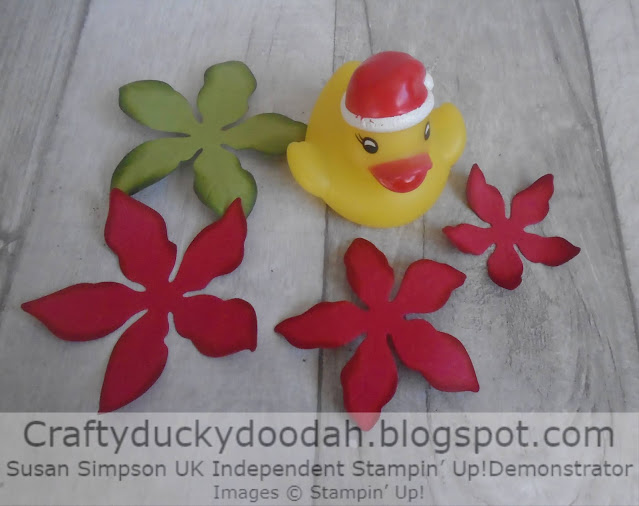
For each flower you will need to cut the pieces shown below.
I inked the edges of each petal with the same colour ink as the card I used. I then curled and shaped each petal.
Top tip:
Curl some of the petals upwards and some under for a more natural look.
To assemble:I found the regular/original sized dimensionals were perfect for this project.
Quick and simple to assemble - these little decorations would also be fun for children to make too.
The completed project:
I had an assembled flower left from my earlier Christmas wreath project - both flowers were made in the same way but is is amazing how much difference adding some ink to the petals makes isn't it?
I think I will use garden twine for the tags as I usually use brown paper to wrap my gifts - now all I need to do is get on with my Christmas shopping!
Next up is my crafty friend Mo Rootes who I am sure has a lovely project to share. I'm going to make myself a festive hot chocolate and hop around to see what everyone has made this month.
If you get lost along the way a list of participants can be found below. Details of the products I used for my project can be found at the end of the post. Don't forget to leave comments as you hop around; we love to know what you think of our projects.
Happy hopping!
Susan xx
Roll Call
If you need to order any supplies, simply use my “shop with me” button or click on the catalogue links on the right. Alternatively, contact me and I would be happy to place an order for you.
If you would like a copy of either of the current Annual Catalogue or the current Mini Catalogue let me know and I will pop one in the post for you. If you prefer, you can view an online version by clicking the link to the right of this post. Also, the January - June Mini Catalogue and the Sale-A-Bration Brochure will be available very soon - if you would like a copy, let me know!
Thank you for shopping with me and supporting my business.


What a lovely idea :-)
ReplyDeleteThank you.
DeleteThis is a great idea - I just love it, thanks for sharing with us
ReplyDeleteThanks Cindy, they were great fun to make.
DeleteVery clever! Love these dies.xx
ReplyDeleteThanks Stacey, I will not be parting with these dies! xx
DeleteOh it is such a good idea to use those wood elements as a starter for your decoration! The poinsettia looks so lovely on it!
ReplyDeleteThanks Annette, the Poinsettia sit on the wood slices so nicely, anybody would think I planned it! (I didn't).
DeleteLovely idea x
ReplyDeleteThanks Karen. xx
DeleteStampin' Up! Demonstrator28 November 2020 at 15:53
What a great idea to use the largest flower as the "leaves" behind the flower. I never would have thought of that! Lovely ornament.
ReplyDeleteThank you Tracie, I was going to use holly leaves but decided I liked green petals better.
DeleteSuch a clever idea Susan x
ReplyDeleteSimply beautiful ornaments. I love the detail in the poinsettias and the color combination is perfect.
ReplyDeleteThanks Tricia, they would also look good in lots of different colours too.
DeleteThese are gorgeous Sue, thank you so much for hopping and sharing x
ReplyDeleteGreat idea! Love these dies
ReplyDelete