Brilliant Wings - Ink & Inspiration
Hello and welcome to the Ink & Inspiration Blog Hop. This is my first time hopping with these talented crafters. If you have hopped over from Diane Evans in Canada or you are starting here with me at Craftyducky HQ, welcome we have lots of fabulous inspiration to share with you.
Our theme this month is 'Let your colours shine'. I decided to keep my project simple and do just that - let the colours shine!
No stamping for this project, just one die cut using these amazing dies, ink, paper and ribbons!
I have used the Brilliant Wings dies a lot - I love butterflies. This set has the option for solid die cuts or intricate die cuts and offers so many options for creative colouring.
Here is my project:
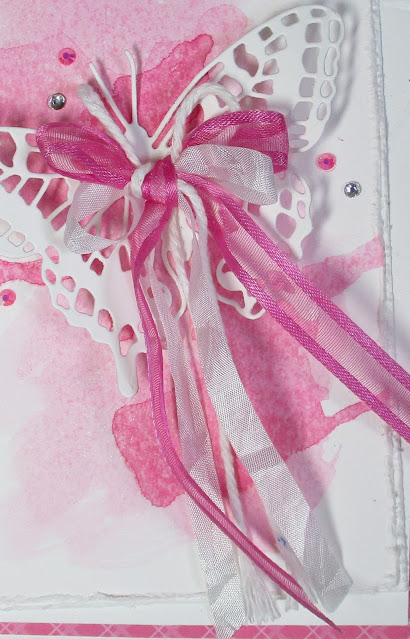
A fun, easy to create inky background, scuffed edges and a pop of colour finished off with jewels and pretty ribbons.
The colours I used:
As you will see below, I created inky backgrounds using all the new In-Colours.
You will need:
21 cm x 14.c cm Basic White Thick (BWT) - scored at 10.5 cm
10 cm x 14 cm Designer Series Paper (DSP)
9.5 cm x 13.5 cm BWT
9 cm x 13 cm Basic White (regular)
9 cm x 13 cm Fluid 100 Watercolour Paper
Scrap of BWT for die cutting
1.5 cm x 10 cm DSP (inside)
1.5 cm x 11 cm DSP (envelope)
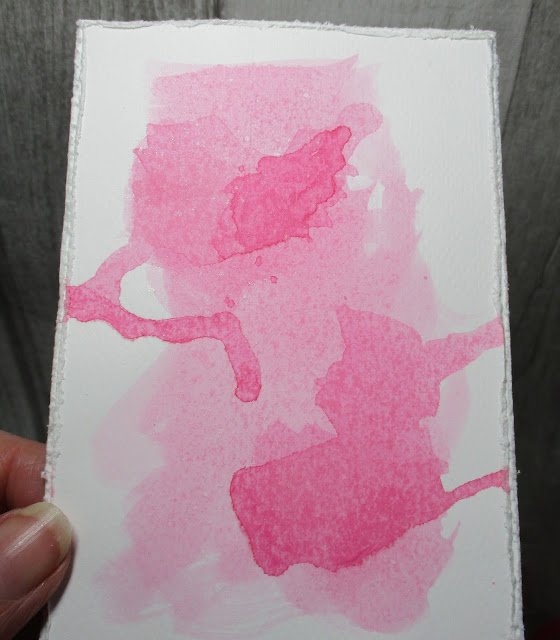
To create the water colour background:
I used two water painters to create the background; one I kept clean to add water to the paper and the other to add colour with.
Add generous sweeps of plain water to the water colour paper. Then, using ink squished into the lid of an inkpad pick the colour up with the other water painter. Dab the ink onto several of the damp areas.
Dry with a heat tool and then add more ink as often ask you like until you are happy with the result (I did this 3 times for my project). You can have lots of fun creating splodges and inky 'runs'.
Top Tip #1:
Once the water coloured panel is dry I place it under a punch to straighten/flatten out.
Of course I got carried away and created a background piece in all 5 of the new In-Colours!
This is such a fun technique - you never quite know what you are going to end up with and, no two will ever be the same!
I added some splatters of Wink of Stella (WoS) to the background for a bit of sparkle. Simply flick the nib on the inside of the lid to create. You can just about see some of the splatters below - WoS is so tricky to photograph!
The embossing and die cutting:
Emboss the 9.5 cm x 13.5cm panel of BWT with the Painted Texture 3D embossing folder. I die cut the largest butterfly using a scrap of BWT card.
To assemble:
Adhere the piece of DSP and the embossed panel to the front of the card using Tombow.
Scuff the edges of the regular BW card and the water coloured panel and adhere to the card front at an angle using Tombow.
Shape and curl the wings of the butterfly and adhere along the body only with Tombow.
The ribbon tying:
I used two different pieces of ribbon and baker's twine for my bow - layer them together in a 'sandwich' keeping each piece on the reel. Tie in a bow, adjust and trim. I frayed the edges of the baker's twine to add some texture. Separate, pull apart and arrange the three strands of the bow and adhere to the centre of the butterfly with two or three glue dots.
The detail:
I added a few In-Colour and rhinestone jewels for more sparkle and shine.
Top tip #2:
If you are not confident tying ribbons you can always tie each one individually and adhere each one with a glue dot.
Top tip #3
If you like your projects neat and tidy you can always arrange the ribbons and place a glue dot underneath to keep them in place.
The inside/envelope:
The In-Colour 2021 - 2023 DSP I used is a 6" x 6" sheet. I saved the offcuts from my initial background piece to decorate the inside of the card and the envelope.
The completed project:
I have left my project without a sentiment as I like to keep a stack of cards ready for when I need them. The bottom left hand corner is perfect for a little 'Happy Birthday' or 'thank you' stamped onto a piece of water colour paper with the same colour ink. I will be scuffing the edges on this too before adhering with dimensionals.
I hope you have enjoyed my project today, thanks for hopping along with us - follow the link below to see what Melva Peters has created.
Happy Hopping!
Susan xx
Craftyducky! HQ
Thank you so much for looking at my Blog today. Unfortunately I am no longer a Stampin' Up! Demonstrator. SU regulations are very strict; I have to wait 3 whole months before I can re-join again.
If you would like a copy of either the current Annual Catalogue or the upcoming Mini Catalogue (July to December), just let me know and I will arrange for a copy to be sent to you.


I love the colorful look of this card cots so fun!
ReplyDeleteWow! Love the technique and love your card!
ReplyDeleteSuch a pretty card Susan love a butterfly and a bit of pink x
ReplyDeleteSo pretty, thank you for sharing!
ReplyDeleteBeautiful card and Love your technique !
ReplyDeleteBeautiful card Susan! Love your colour choice, it really pops! :)
ReplyDeleteVery cute card Susan
ReplyDeleteA very pretty card - love Polished Pink!
ReplyDeleteOoh, lovely - reminds me of a dream catcher!
ReplyDeletePretty in (Polished) Pink! Love the dangling ribbon... and the watercolor wash background.
ReplyDelete