In Bloom - Stampers Showcase
Hello and welcome to another Stampers Showcase Blog Hop. If you have hopped over from Ange McKay in Canada or you are starting here with me at Craftyducky HQ, welcome we have lots of inspiration to share with you this month.
Our theme this month is Summertime Florals. With so many gorgeous floral stamp sets to choose from this was a tricky one for me. It took me some time to decide but eventually, I went for a stamp and die bundle called In Bloom - it has been sat on my shelf unused so this was the ideal time to reach for it. All the die cuts also have stitched edges - I love anything that has stitched edges so there was no hesitation in ordering this bundle!
There are 21 stamps and 25 dies - you can buy them as a bundle with a 10% saving. I love the different shapes and sizes of the flowers and all the little extra details you can add to the centres of the flowers. There are multiples of some of the dies too so great for batch making. So many ideas, so little time to play!
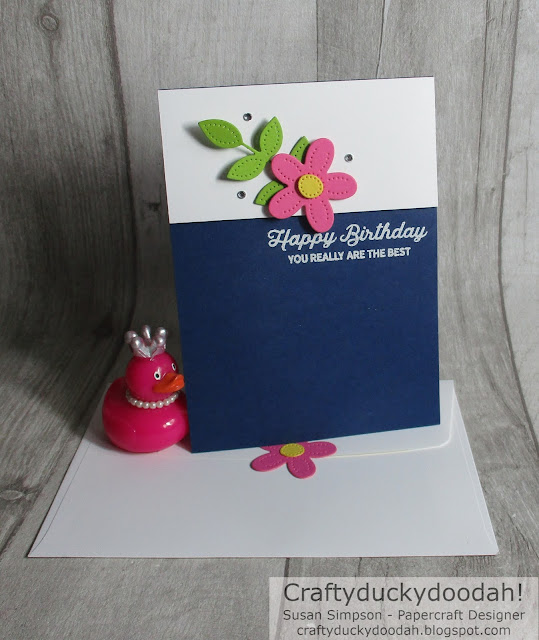
Here is my project:
A very quick and simple project using a bright and cheerful colour combo.
The colours I used:
You will need:
29m cm x 10.5 cm Night of Navy - scored at 14.5 cm
10 cm x 14 cm Basic White (BW) - insert
10.5 cm x 5 cm Basic White Thick (BWT)
Polished Pink, Granny Apple Green and Daffodil Delight cardstock for die cutting with
The die cutting:
I always cut out lots of die cuts when I am working on a project. More often than not, I don't use all of them but they often lead to my next project!
The sentiment:
My crafty ladies have been doing lots of heat embossing over the last few days at my first in person workshops for a long, long time. As I had not tidied everything away I decided I would heat emboss the sentiment.
Lay the BWT panel on the top of the card to give you an idea of where to position the sentiment.
Top Tip #1:
I always use and embossing buddy when I heat emboss as it helps to reduce those annoying specks of powder that stick where you don't want them. As I used Night of Navy for my card base with white powder I really didn't want any stray specks of white on my project.
Stamp the sentiment with Versamark ink, sprinkle with embossing powder, gently tap off the excess and set with a heat tool.
What a mess but I did laugh at myself for being such a twit!
To assemble:
I used dimensionals to adhere the BWT panel across the top of the card base.
I then used a dab of Tombow at the base of the stem to attached the leaves and dimensionals for the flower and the centre of the flower.
The details:
Adhering just the bottom of the stem creates depth, dimension and shadows which I love. I added a trio of jewels for a little sparkle.
The inside:
As I had cut out lots of flowers and leaves I adhered a couple on the BW insert using Tombow. I then adhered the insert with double sided tape.
The envelope:
I partially adhered a single flower to the envelope flap using Tombow.
Top Tip #3:
Make sure the bottom part of the flower has no adhesive on otherwise you won't be able to put the card in the envelope!
The completed project:My lovely crafty friend Mary was asking me yesterday for some quick and simple ideas to create packs of cards to sell at her Church fete next month - these will be perfect and will look great in many different colours. This project also has the benefit of being quick and simple to put together!
Next up is is the lovely Liz Yuille who has some more floral inspiration to share with us.
Thank you so much for looking at my Blog today. Unfortunately I am no longer a Stampin' Up! Demonstrator. SU regulations are very strict; I have to wait 3 whole months before I can re-join again.
If you would like a copy of either the current Annual Catalogue or the upcoming Mini Catalogue (July to December,) just let me know and I will arrange for a copy to be sent to you.


Great card.x
ReplyDeleteI love the simplicity of this card! Lx
ReplyDeleteLove the cheeryful colors
ReplyDeleteLove the simplicity of this card Susan and the lovely pop of colour x
ReplyDeleteBeautiful clean card, thanks for sharing x
ReplyDelete