Whale Done - Stamping INKspirations
Hello and welcome to another Stamping INKspirations blog hop. If you have hopped over from Jill Chapman or you are starting here with me at Craftyducky HQ, welcome, we have lots of fun projects to share with you this month!
Here is my project:
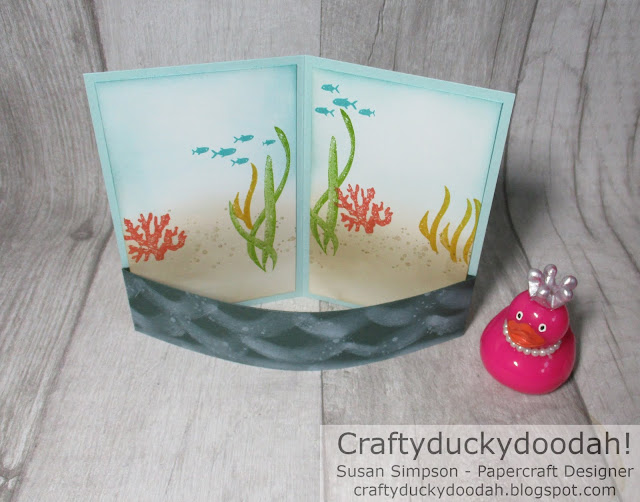
It's a fun bendy card - I love making this type of card as they are so easy to put together and offer lots of creative opportunities.
The colours I used:
You will need:
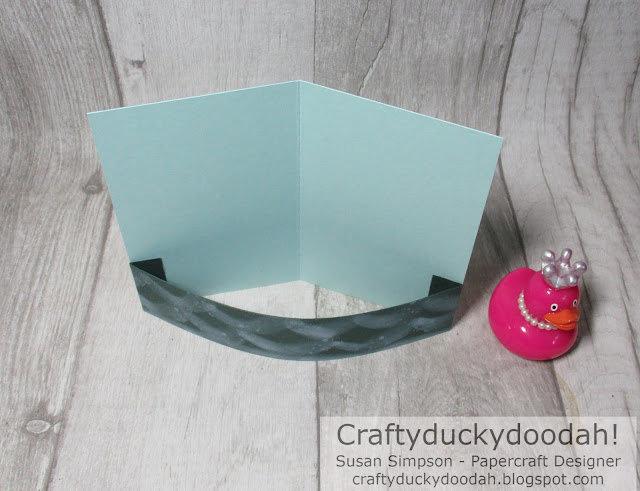
14 cm x 11 cm Pool Party - scored at 7 cm
11 cm x 5.5cm Pool Party - scored at 1 cm on each end and at 5.5cm
16 cm x 3.5 cm Evening Evergreen - scored at 1 cm on each end
6.5 cm x 10.5 cm Basic White (BW) x 4 (2 front, 2 reverse)
Small pieces of BW and Blackberry Bliss
The cutting and scoring:
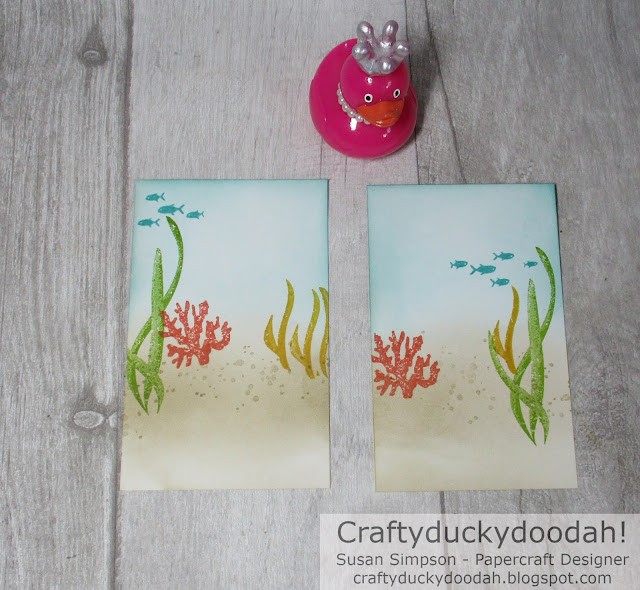
The ink blending and stamping - front panels:
Step 1
Crumb Cake ink used with a blending brush and dots stamped over the top using the same colour ink.
Step 2
The sentiment:
I do like a good pun don't you? This one has been stamped with Blackberry Bliss ink.
The waves:
I used white ink and the tip of a blending brush to create a wave effect on the two centre panels. I also stamped some splodges using the same ink.
To assemble:
Step 1
Adhere Evening Evergreen panel to card base using Tombow. No need to curve the panel as this happens all by itself!
Step 4
The reverse:
Panels created in the same way as the front - don't forget to leave space to write a message!! I added only a touch on Bermuda Bay around the top of each panel.
The envelope:
I used the same inks/method as above with blending brushes to decorate the envelope flap.
Top tip #2:
Place a piece of scrap paper under the flap to avoid making an inky mess of the envelope! I then used various images to create a similar scene to the front and reverse panels.
You will see below that I was having so much fun I decorated the front of the envelope too!
The completed project:
Alternative front panel:
Whilst I was photographing my project I decided that I was not sure about the front panel. Luckily I still had all my inks and stamps out on my desk. I created a panel in the same way as the others for this project. I much prefer this panel, if I had only thought of this in the first place lol! (Panel measures 14 cm x 3 cm).
You can also see above that my project folds flat for posting! I hope you enjoyed my splish splash project?
Next up is Terry Hamilton who has another fun project to share. If you get lost along the way a list of hop participants can be found below.
Thanks for hopping along with us, details of the products I used for my project can be found below.
Susan xx
Angie McKenzie ● Libby Fens ● Karen Henderson
Annette Ball ● Tricia Butts ● Shel Anderson
Elaine de Montmorency ● Mo Rootes ● Deb Macdowell
Alejandra Gomez ● Satomi Wellard ● Ann Krucek ● Teri West
Danielle Kassing ● Gez Carpenter ● Aurélie Fabre
Rebecca-Jo Unwin ● Jill Chapman ● Susan Simpson
Terry Hamilton ● JoAnn Pollock ● Rochelle Laird-Smith
Thank you so much for looking at my Blog today. Unfortunately I am no longer a Stampin' Up! Demonstrator. SU regulations are very strict; I have to wait 3 whole months before I can rejoin again.
If you would like a copy of either of the current Annual Catalogue just let me know and I will arrange for a copy to be sent to you.


Love your bendy card and all the detail you have done! 😍
ReplyDeleteThanks Leonie.
DeleteSuch a fun card Susan and I love how you have achieved the wave effect x
ReplyDeleteThanks Mo - was not sure about it but it has grown on me! xx
DeleteThis card is amazing
ReplyDeleteThank you Danielle.
DeleteWooo what an amazing tutorial! Thank you for this wonderful sharing!
ReplyDeleteThank you Aurelie - it was fun to put together!
DeleteWhat a great curvy card - thanks for showing how you built up the scene.
ReplyDeleteThanks Karen.
DeletePretty background and fun layout for this theme!! Thanks for the tutorial!
ReplyDeleteThanks Ann.
DeleteAmazing card! Thanks for sharing such detailed instructions as well. I have not tried this kind of card yet but now I will.
ReplyDeleteThanks Terry, very easy to make and lots of potential for adding bits and pieces!
DeleteWonderful card! I love this fun fold!
ReplyDeleteIsn't it funny how we can create something that we like better as we work on our projects? Gives a chance to create a duplicate! Absolutely love all the sponging and the details that you put into this awesome fun fold, Susan! Thanks for the inspiration and for hopping along with us. xx
ReplyDelete