Poinsettia Petals - Stamping INKspirations
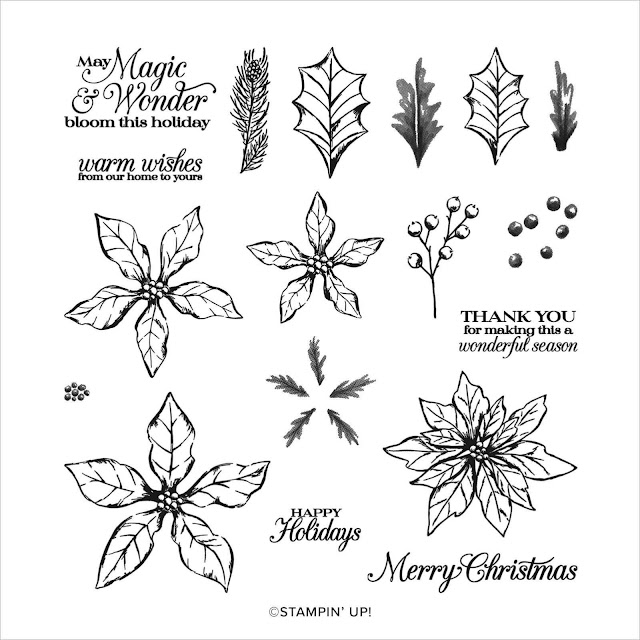
Hello and welcome the latest Stamping INKspirations blog hop. This month our theme is 'Christmas in July' - I will be using a beautiful stamp set called Poinsettia Petals for my project.
Poinsettia Petals is a stamp set that comes with coordinating dies and I have used it ever such a lot.
Poinsettia Petals is a two-step Stampin' set allowing you to layer up two or more images to create one final image with extra texture and dimension.
I was so pleased that this set stayed with us - so many ideas, so little time as usual!
Here is my project:
When colouring projects I tend to reach for my Stampin' Blends so for a change I decided to use my watercolour pencils.
The colours I used:
You will need:
21 cm x 14.5 cm Crumb Cake - scored at 10.5 cm
10 cm x 14 cm Crumb Cake
10 cm x 14 cm Basic White (BW) for the insert
The stamping and embossing:
I used Versamark ink to stamp onto the Crumb Cake panel and then heat embossed with white embossing powder.
The colouring:
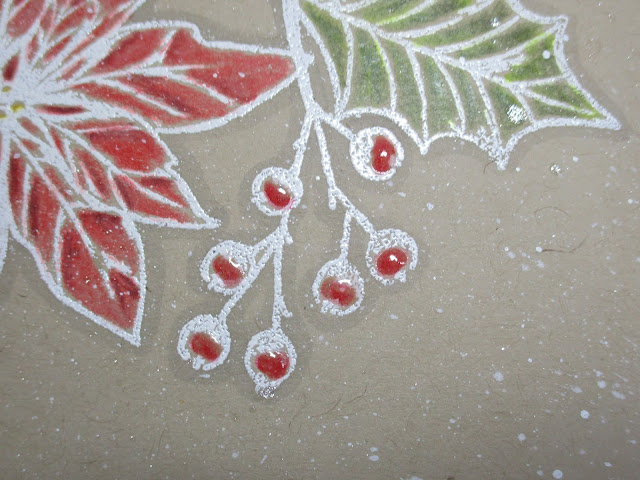
I used watercolour pencils to add colour to the images. For the Poinsettias I used Real Red and then added some Cherry Cobbler to add a little shading. Colouring on Crumb Cake cardstock makes a nice change from white card.
I then went over my colouring with a Blender Pen (not to be confused with the Blends Blends Colour Lifter)! This pen contains a specialised solution to enable you to blend the was from the pencils - it sort of smooths away lines etc and makes colouring look better!
Top Tip #1:
I like to make images pop; I carefully outlined the embossed images with a Light Smoky Slate Blend. You can barely see it but trust me in makes a difference in real life.
Top Tip #2
This technique also works when you use white cardstock using a soft blue pen instead.
The splattering:
I decided that my project looked a little too neat, clean and tidy for me so I added some splatters of white craft ink and Wink of Stella for a little sparkle.
Top Tip #3:
Place a small drop of white craft ink onto a stamp block. Using a Water Painter, add a little water and load up the brush. Flick the brush against the inside of the lid of the pen to create the splatters. Larger splatters can take around 30 minutes to dry but they are worth wait! A single, tiny drop of ink is all you need.
To assemble:
Scuff the edges of the the panel and the adhere a length ribbon across the front adhering on the reverse with double sided tape.
I used dimensionals to adhere the completed panel to the card base. The bow has been adhered with a mini glue dot.
The inside/envelope:
I used Crumb Cake ink to decorate the insert (yes, I scuffed the edges on this piece too) and the envelope for a coordinated look.
The details:
I used Shimmery Crystal Effects on the berries to add some lovely glossy dimension. Again this can take around 30 minutes to dry but the effect is definitely worth the wait!
The completed Project:
So here is my completed project. Spot the Christmas Craftyducky!!
When working on projects I always create more backgrounds than I need so I created another, slightly different project using the same techniques this time with a white card base and a little more stamping/colouring.
I can't quite decide which version I like best but at least I have two cards in my box for Christmas!
Next up is Gez Carpenter who has another Christmas in July project to share.
If you get lost along the way, a list of hop participants can be found below.
Thanks for hopping along with us, I hope we have inspired your upcoming Christmas crafting!
Susan xx
Angie McKenzie ● Libby Fens ● Karen Henderson
Annette Ball ● Tricia Butts ● Leonie Stuart
Jo Blackman ● Aurélie Fabre ● Mo Rootes
Susan Simpson ● Gez Carpenter ● Jan Musselman
Alejandra Gomez ● Mikaela Titheridge ● JoAnn Pollock ● Jill Chapman
● Linda Moore ● Ann Krucek ● Teri West
Thank you so much for looking at my Blog today. Unfortunately I am no longer a Stampin' Up! Demonstrator. SU regulations are very strict; I have to wait 3 whole months before I can re-join again.
If you would like a copy of either of the current Annual Catalogue or the upcoming Mini Catalogue just let me know and I will arrange for a copy to be sent to you.


Love your card, especially your approach to coloring the images. Beautiful!
ReplyDeleteLove this card Susan, such a great technique x
ReplyDeleteAbsolutely gorgeous cards Susan!💕 I don't use my pencils very often, but I will try this. Love the effect you get.
ReplyDeleteGorgeous, I love this technique, thank you for sharing x
ReplyDeleteThese came out beautiful!! I like this look on the crumb cake card stock!
ReplyDeleteColouring on crumb cake is lovely- very festive
ReplyDeleteBeautiful colorization job and very pretty creation with these Crumb Cake and Red shades. Thank you for sharing !
ReplyDeleteAH-MAZING!!!!! Truly love the watercolor pencils with the white embossing and the touch of the Smoky Slate Blends for the added pop against the Crumb Cake. Simply striking pair of cards, Susan. Thanks for the tips, inspiration and for hopping with us.
ReplyDelete