Love Of Leaves - Stampers Showcase
Hello and welcome to another Stampers Showcase Blog Hop. This month we are sharing projects for Autumn/Fall/Halloween.
If you are starting here with me or have hopped over from Melissa in the USA, welcome we have some great projects to share with you this month.
I decided to use one of my favourite bundles - Love of Leaves. Autumn is my favourite time of year, I love to see the leaves change colour and I can't wait for that first crunchy, swishy walk through colourful leaves!
Here is my project:
The colours I used:
You will need:
21 cm x 14.5 cm ww thick - scored at 10.5 cm
10 cm x 14 cm ww thick
ww thick for stamping and die cutting the leaves
Small piece of Basic Black for the sentiment
The background:
I scuffed the edges of the ww panel and then added colour to the edges using Sponge Daubers and the ink colours shown above. I did my best to keep it random but it is easier said than done!
The stamping and die cutting:
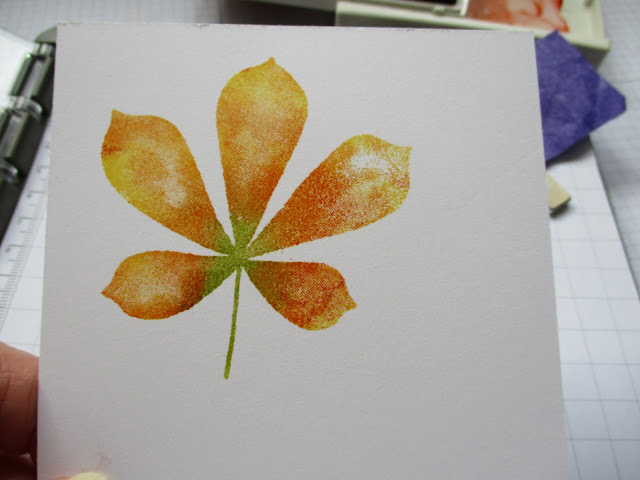
I used my Stamparatus for the leaves. I inked up the largest leaf with Daffodil Delight ink and stamped onto ww thick card. I then reinked the stamp using Sponge Daubers and all the colours shown above.
Top Tip #1
I love this technique - you never quite know what you are going to end up with! I made a whole pile of leaves to use on my project.
Top Tip #2
When using Tombow to adhere the leaves be careful where you put the glue. You only need tiny dabs but if you put the glue over the stitched veins it will 'pop' through to the front of the leaf when you adhere!
I used a couple of mini glue dots to adhere a piece of this lovely golden thread; creating loops and separating the threads at each end to add dimension.
The sentiment:
I used Versamark ink to stamp this simple sentiment onto a scrap of black card. I used white embossing powder and heat set. I added the sentiment with dimensionals.
To assemble:
Adere the background panel to the front of the card with dimensionals. Now it's time to arrange the leaves - I was aiming for a sort of tumbling down effect. The first leaf was adhered with Tombow. The second with dimensionals and the third leaf with a single layer of dimensionals where it overlaps the second leaf and a double layer of dimensionals at the bottom. Adhere the sentiment with dimensionals. I added a trio of gilded gems for a bit of sparkle.
The inside:
I stamped the other half of my sentiment on the inside using Memento ink. I adhered some of the spare leaves across the bottom of the card, trimming off the excess to create a pretty and colourful border.
Outtake!
The photo below shows my first attempt at decorating the inside of this project! Spot the deliberate mistake? I will not waste this though and will definitely use it to create another project at some point.
The envelope:
I had intended using up the rest of the leaves to decorate the envelope. However, due to my mistake above I only had a couple of spare pieces of leaves. I adhered the leftover pieces to the front of the envelope using Tombow.
The completed project:
I really like this card; I will be sending it to my best friend who I have not seen for absolutely ages. She lives at the edge of a tree lined valley that looks stunning at this time of the year. I know she will appreciate this card.
I have used the lovely bundle a lot and whilst editing this post, I realised I used it for my Stampers Showcase project last month (you can see it HERE). I hope you enjoyed my project - I would you to leave a comment (it makes my day).
Next up is Lisa Mackey from the USA who I know has a lovely project to share with us. Thanks to Dana for keeping us all organised.
Thanks for hopping with us, details of the products I used for this project can be found below.
Susan xx
If you have any questions, or need help with anything I’m always happy to help. You can email me susan_merrey@yahoo.co.uk or telephone 07905 403 823 during normal working hours.
If you need to order any supplies, simply use my “shop with me” button or click on the catalogue links on the right. Alternatively, contact me and I would be happy to place an order for you.
If you would like a copy of either of the current Annual Catalogue let me know and I will pop one in the post for you. If you prefer, you can view an online version by clicking the link to the right of this post. Also, the August - December mini catalogue will be available very soon - if you would like a copy of either catalogue, let me know!
Thank you for shopping with me and supporting my business.


What a fantastic technique for coloring the images, and a fantastic one for embellishing the inside and envelope!! Well done!! "No naked insides and no naked envelopes!"
ReplyDeletePretty card and pretty leaves Susan, love it x
ReplyDeleteStunning colours and I love that you have left the rest of the card plain to make the leaves really stand out!xx
ReplyDeleteI'm excited. The card is so beautiful and the idea with the edge is awesome
ReplyDeleteI really love your card and the leaves, oh my, they are gorgeous!!
ReplyDeleteLove the colours of your beautiful leaves. A stunning card Susan!
ReplyDelete