Beauty Of Friendship - Stamping INKspirations
Hello and welcome the latest Stamping INKspirations Blog Hop! If you have hopped over from Terri West or starting here with me at Craftyducky HQ we have some fabulous projects to share with you this month.
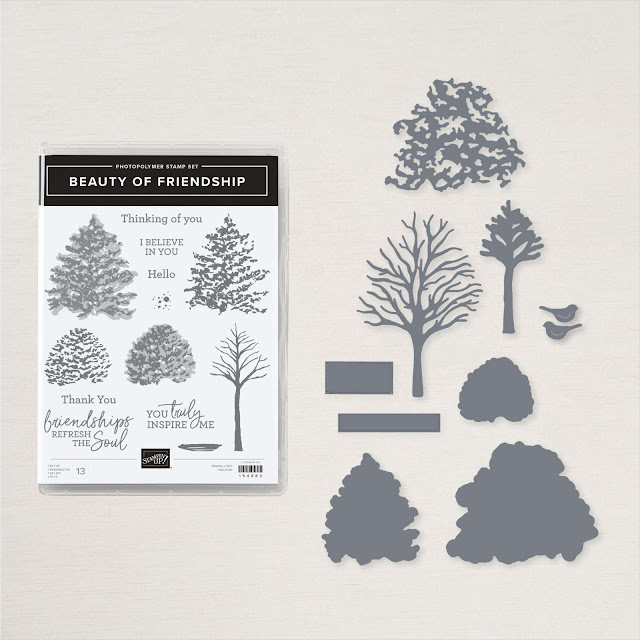
This month our theme is fonts and mixed media. I will be using a stamp set called Beauty of Friendship for my project.
I love to use different fonts in my projects and I am not adverse to a spot of mixed media either so, this challenge was right up my street!
I also love trees and leaves too. Beauty of Friendship was one of the first bundles I ordered from the latest Annual Catalogue. I love these images, perfect for a simple project or to create a whole forest of trees at any time of the year.
Here is my project:
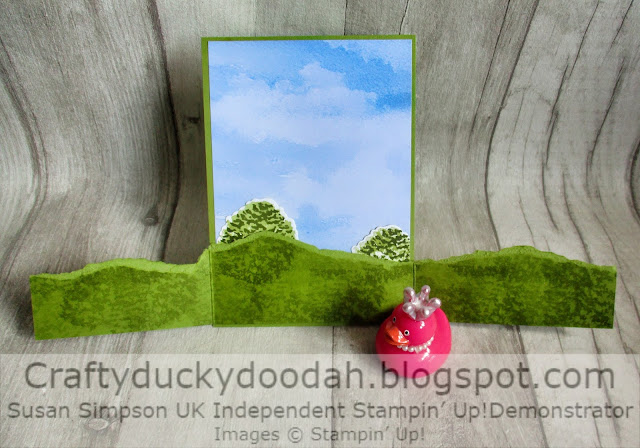
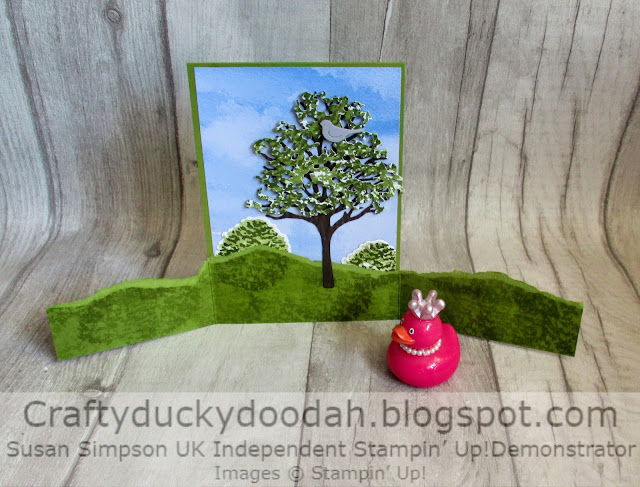
My project looks a little odd below but wait until you see it opened out - then it will make sense!
The colours I used:
You will need:
10.5 cm x 29.9 cm Old Olive - scored at 14.5 cm (the longer edge is the reverse of the card)
10 cm x 14 cm piece of DSP
6.5 cm 29 cm Old Olive - scored at 8.5 cm and 19 cm
Small piece of Smoky Slate - birds
Early Espresso - trunks
Basic White thick - tree tops/hedges
10 cm x 14.5 cm Basic White - for the inside
To create the grassy banks
Stamp the smaller tree top using Old Olive ink randomly across the panel using first and second generation stamping.
To create the hedges
Ink up the stamp with Old Olive and spritz with clean water. Stamp onto BWT card. Ink up the detail stamp with Mossy Meadow and stamp over the top. Cut out with the coordinating die. You will need two.
I found that spritzing twice was not quite enough, but three times was too many! Have a play and see what effect you prefer.
Top Tip #1
If like me you use a piece of tape to hold dies in place, make sure the card is totally dry before die cutting otherwise you risk tearing when you remove the tape.
The tree trunks:
Die cut using the large tree trunk and Early Espresso card - you will need three. Emboss with the Bark embossing folder. The photo below shows two of the smaller trunks which I eventually decided not to use for my project but I am sure you get the idea.
Embossing the trunks is a great way to add texture and dimension to a project.
Top Tip #2
Think about which way you place the trunks in the embossing folder, wonky bark does not look good! An added benefit of embossing the trunks is that they look good on both sides which is useful when you open the side pieces on this project.
The tree tops:
Die cut using BWT card - you will need three. I repeatedly stamped the tree top image using Old Olive ink first and second generation stamping. I then added some Mossy Meadow ink to add more shade. You will need to stamp both sides of the die cuts.
To assemble:
Adhere the piece of DSP to the front of the card with Tombow. Remember the strange dimensions above for the card base? Make sure the longer side is the back of the card.
Tear across the Old Olive piece of card to create grassy banks. Make sure that the wider panel is on the right hand side as you tear.
Top Tip #3
Tear towards you so that you get the contrast between the stamped section and the torn edge.
Top Tip #4
If you are careful, you can use the torn off strip for another project.
Adhere the centre section of the strip across the front of the card using Tombow.
Carefully tuck the two hedge pieces under the torn edge adhering with Tombow. I trimmed the edge of the hedge on the right so that it was flush with the side of the DSP.
Adhere one of the tree trunks with Tombow to the centre panel. The tree top has been adhered with mini dimensionals. If you are careful you will find spaces to stick them so they don't show on the front. The little bird has also been adhered with a mini dimensional.
Next assemble the tree for the front of the card. Adhere the bottom of a trunk onto the front of the card using Tombow. I then used mini dimensionals on the back of the tree top to adhere it to the first tree trunk.
Add a die cut bird to the front and back of the doubled up tree using mini dimensionals.
When folding the card to fit into the envelope, close the right hand (larger side) first.
The inside/envelope:
I stamped a smaller tree using Early Espresso for the trunk and Old Olive and Mossy Meadow for the top. Attach the piece of BW card to the card base with Tombow. The extra length on the back of the card will help the card to stand straight when the sides are opened out. I also stamped a tree on the envelope.
The sentiment:
I had intended to find a sentiment that had a mix of fonts but I completely forgot! My sentiment has been stamped using Early Espresso ink and cut out with a die included in this lovely bundle. It has been adhered with mini dimensionals. The little bird perched on top has also been adhered with a mini dimensional.
The details:
Each of the birds has a black eye created by colouring a jewel with a Stampin Blend.
I love the effect you can achieve stamping an image several times - this one looks a little like camouflage don't you think?
The completed card and envelope:
I was quite please with how this card turned out - it was a project I had had in my mind for some time. If you changed the colours and the trees had no leaves this would make a great Christmas card too! (I'm thinking lots of snow like glitter too)!!
I hope you enjoyed my project and all the different techniques I used to add texture and dimension? Thanks for hopping along with us. Next up is Aurelie who has another great project to share with us.
Happy hopping!
Susan xx
Angie McKenzie ● Rochelle Laird-Smith ● Karen Henderson
Leonie Stuart ● Jessie Holton ● Jo Blackman
Cheryl Hamilton ● Libby Fens ● Tricia Butts
Mo Rootes ● Shel Anderson ● Elaine de Montmorency
Thank you so much for looking at my Blog today.
If you would like a copy of either of the current Annual Catalogue or the latest Mini Catalogue just let me know and I will get copies to you asap.


Beautiful card!
ReplyDeleteThanks Cheryl.
DeleteLovely card :-)
ReplyDeleteThanks - it was a lot of fun to make!
DeleteLots of lovely texture ion your card Susan, love it x
ReplyDeleteAww thank you Mo! xx
DeleteBeautiful card!
ReplyDeleteThanks Terri.
DeleteSo much work Susan! So many great tips and ideas too! Love your card!
ReplyDeleteThanks Deb, tips are always good!
DeleteLove your beautiful card. The font is perfect! Great design 😊
ReplyDeleteThank you Leonie.
Delete