In Bloom - Ink & Inspiration
Hello and welcome to another Ink & Inspiration Blog Hop! If you have hopped over from my crafty friend Mo or you are starting here with me at Craftyduckyducky HQ, welcome, we have lots of clean and simple projects to share with you this month. I will be using the fabulous Pierced Bloom Dies for my project.
I love dies that have stitched edges and am lucky enough to have many stitched edge sets. The Pierced Blooms Die are on my desk to be used a lot. There are 25 dies in the set with flowers in several sizes and the centres and leaves to go with them. All with lovely stitched edges!
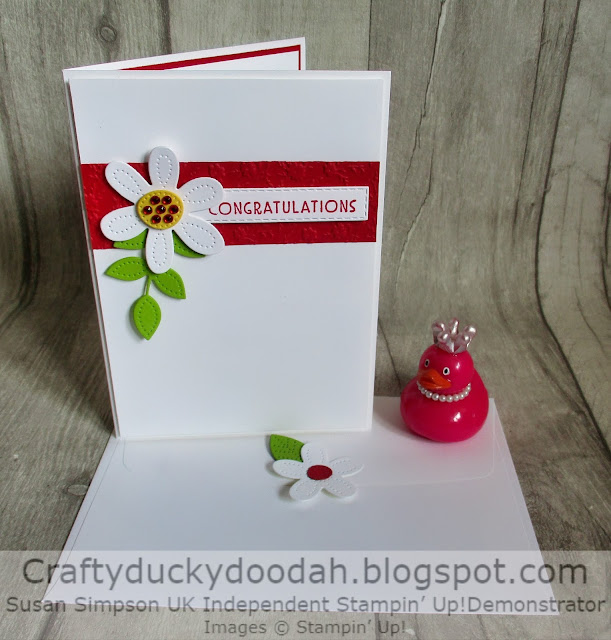
Here is my project:
The colours I used:
You will need:
21 cm x 14.5 cm Basic White Thick (BWT) - scored at 10.5 cm
10 cm x 14 cm BWT
10 cm x 3 cm Real Red
14 cm x 10 cm Real Red
13.5 cm x 9.5 cm BWT
Small pieces of BWT, Daffodil Delight, Granny Apple Green and Real Red for die cutting
The embossing:
I used the Ornate Floral 3D embossing folder to add interest to the Real Red cardstock.
Adhere the BWT 10 cm x 14 cm panel to the front of the card with dimensionals. I then adhered the Real Red card using Tombow.
The die cutting:
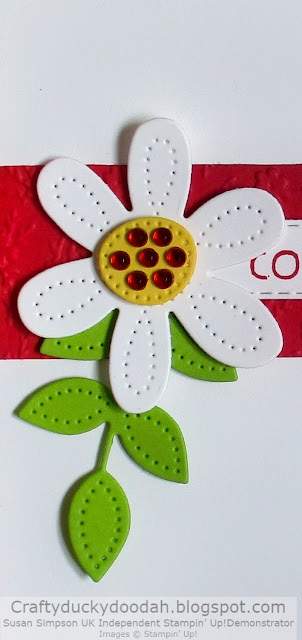
I cut a selection of flowers, centres and leaves for my project. Did I mention that I love the stitched detail you achieve with these dies!
The flower has been assembled using dimensionals and adhered to the card front. To adhere the leaves I used a dab of Tombow on the bottom of the stem and tucked underneath the flower.
The sentiment:A simple sentiment from a stamp set called Inspired Thoughts stamped with Real Red onto a stitched edge rectangle die. It has been adhered using mini dimensionals and tucked under the flower.
The inside:
Adhere the Real Red card to the inside and then add the BWT piece on top using Tombow. For a coordinated look I added another die cut flower and some leaves.
The envelope:
I always decorate the envelopes on my projects - not to do so is a waste of a creative opportunity I think. I added another flower, this time with a single leaf using Tombow.
Top tip:
Think about where you put the glue on the flower - that's all I am saying!!
The detail:
I added lots of red rhinestones to the centre of the flower. Looking at the photo now (isn't hindsight a wonderful thing?) I think I would have preferred to add a Real Red centre and clear rhinestones.
The completed project:
I have used this layout lots of time for different projects - it just works and there are countless variations which is great - especially when you need a project in a hurry!!
Thanks for hopping along with us, I hope you enjoyed my clean and simple project. Details of the items I used for my project can be found below. Next up is Kylie Swain who has another great project to share.
Thank you so much for looking at my Blog today.
If you would like a copy of either of the current Annual Catalogue or the latest Mini Catalogue just let me know and I will get copies to you asap.


Absolutely fantastic - The bright colours on the white background are so effective.
ReplyDeleteWhat a pretty card! Thanks for sharing!
ReplyDeleteLovely card! - Ann Alexander
ReplyDeleteBright beautiful card Susan!
ReplyDeleteThank you Maheswari.
DeleteLovely card Susan, love the bright colour palette x
ReplyDeleteThanks Mo xx
Deletesuch a fabulous card.
ReplyDeleteThank you Rachael.
DeleteJust fabulous Susan! Minimal is often more effective and this card proves it! Love it!
ReplyDeleteThanks Deb - my friend loved it too!
DeleteI just love the simplicity of this card, and the bright fun colours.
ReplyDeleteThanks Kylie.
DeleteGorgeous card. Love the flower on the envelope.
ReplyDeleteThanks Shelley - a naked envelope is a wasted opportunity!!
DeleteI absolutely love the crispness of these bright colours on the white, so sweet too x
ReplyDeleteThanks Robyn. xx
Delete